
By Melissa Moyles
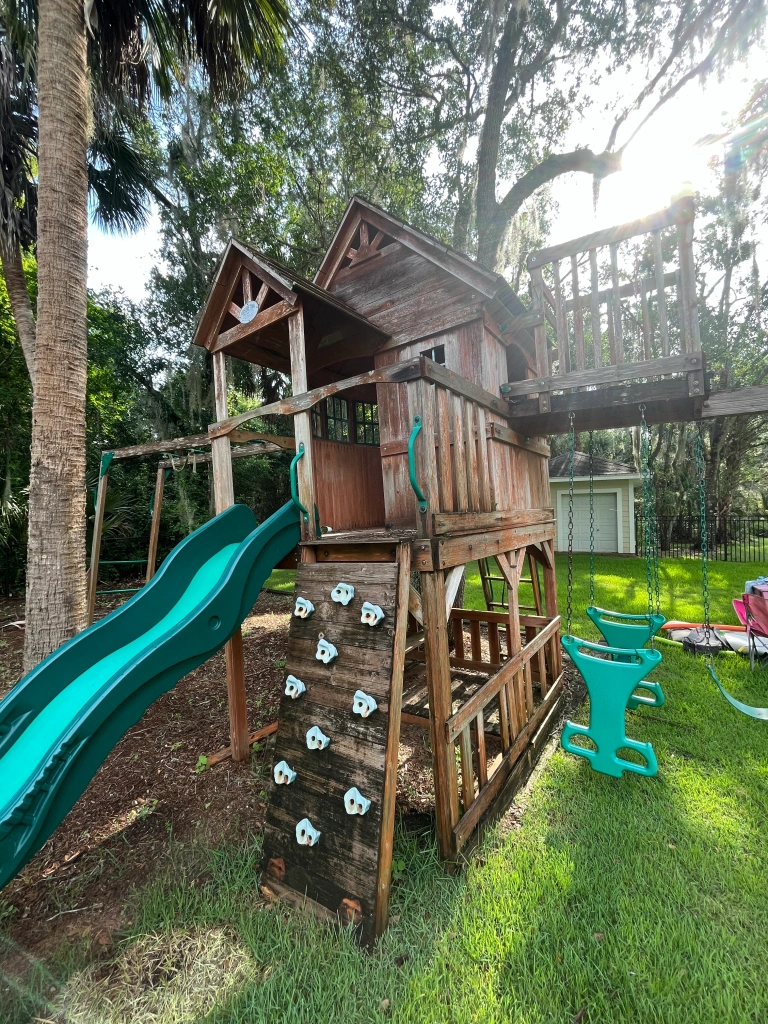
Hello! How is it already the end of July? This summer has FLOWN. June was all about fun trips: Boston, Steinhatchee, and Bar Harbor Maine (blog posts to come one day…) But July was dedicated to flipping the girls old dirty playhouse.
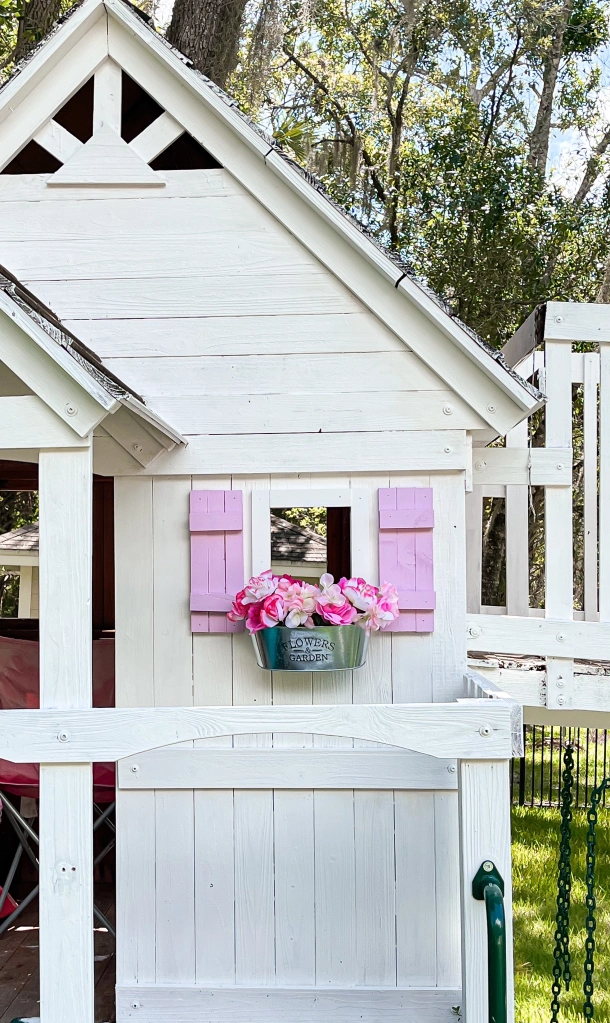
We bought this playhouse from Sam’s Club in 2017 and it has been well loved. It also could use some love (and paint).
After 3 solid weeks of painting (I wish I was joking), I was finally ready to add some fun finishes. The first incredibly easy addition was pink shutters. These were so easy to make the girls did most of the work. And since I used scrap wood, they cost me basically nothing.

Here’s how we made them:
- I had cheap 1 inch pine boards on hand but anything similar is fine – use what you have. Cut 3 to the window height and 2 to the width of the shutter.
- Dry fit the boards. I put the horizontal boards 2 inches from the top and bottom. Little helpers are great here!
- Using 1 inch brads, I attached the horizontal boards to vertical boards. This was all 3 girls first time using a brad nailer and I was excited to show them the proper and safe way to use it.
- Paint any fun color! We used Behr Bedazzled in an Outdoor Satin finish.
- Attach to the playset using 1 inch brads.
I love how it adds a pop of color to my now all white playset. And it was one small win in a long list of fun additions to the playhouse!

Tag me on instagram @3daughtersdiy if you try to make shutters of your own!
Best, Melissa and Girls

0 Comments